Texture first, model later
Once, I made a well received thread on twitter (now deleted) sharing how I work with tilable textures on 3d models, taking stairs as an example. I presented a reverse approach from the usual workflow. It gathered 8k likes in a few hours. I was very proud.
It was 4 years ago. Since then, twitter turned into crap and I found others ways of using textures and shaders. I'll talk about my new workflow in a next post - the one I recommend to aim for environment quality while maintaining a coherent art direction and managing a team easily.
But for now, let's talk about stairs again!
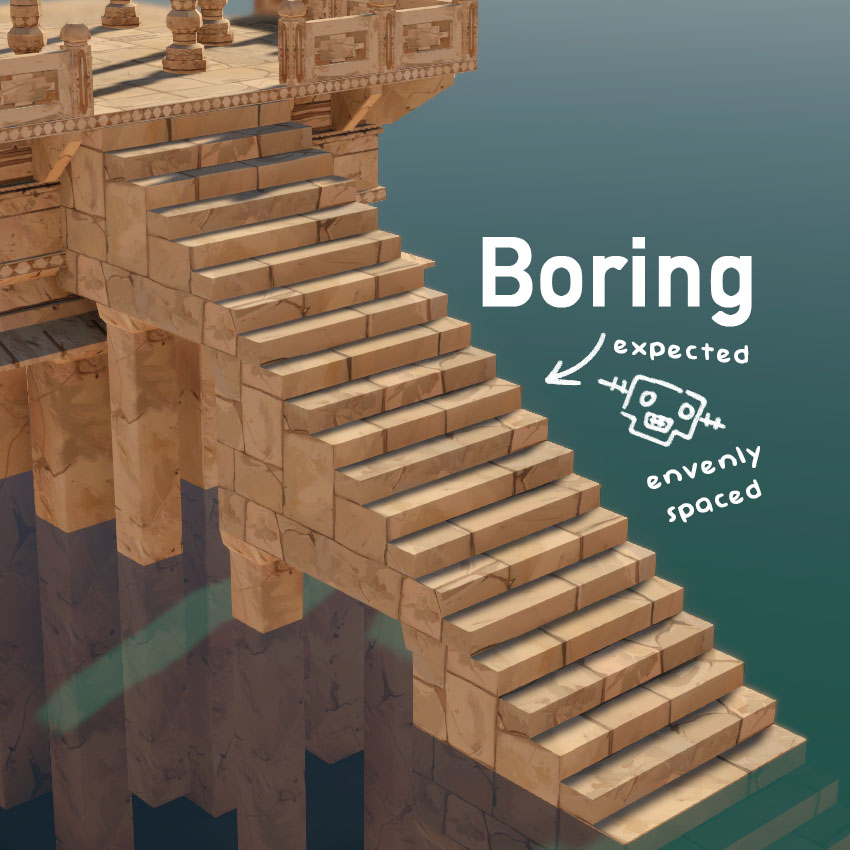
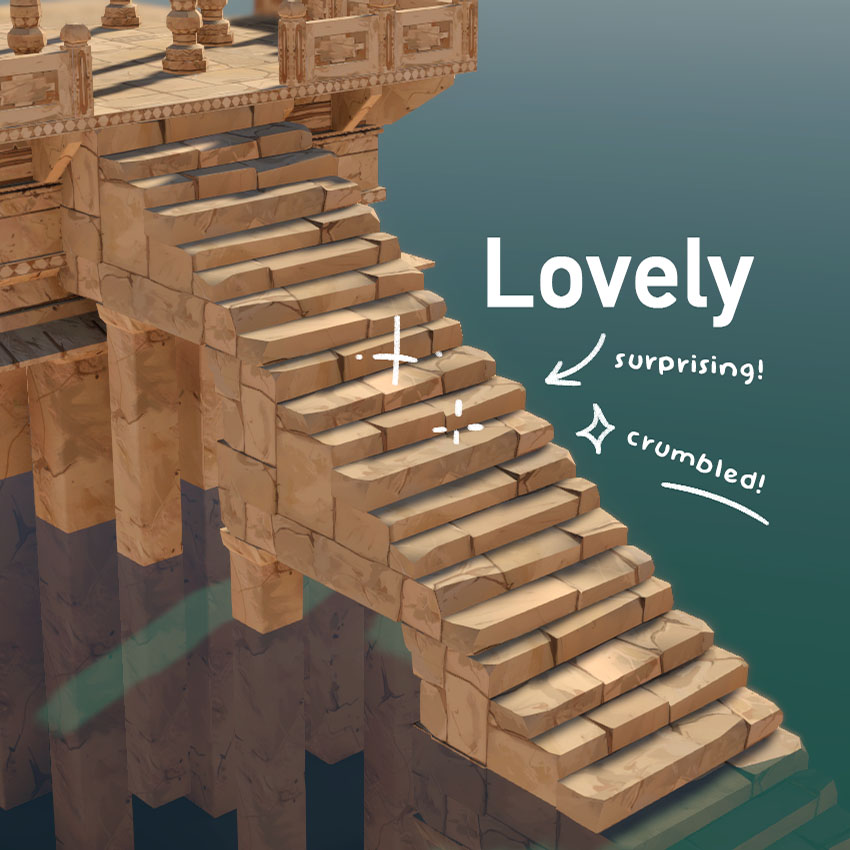
Stairs are the perfect example of something repeating over and over, right? But old stone stairs are different, full of oddities; each step feels unique. How can we simplify something as organic as this, so we can assemble an entire scene without being required to model and texture every single part?
Modules as a way of life
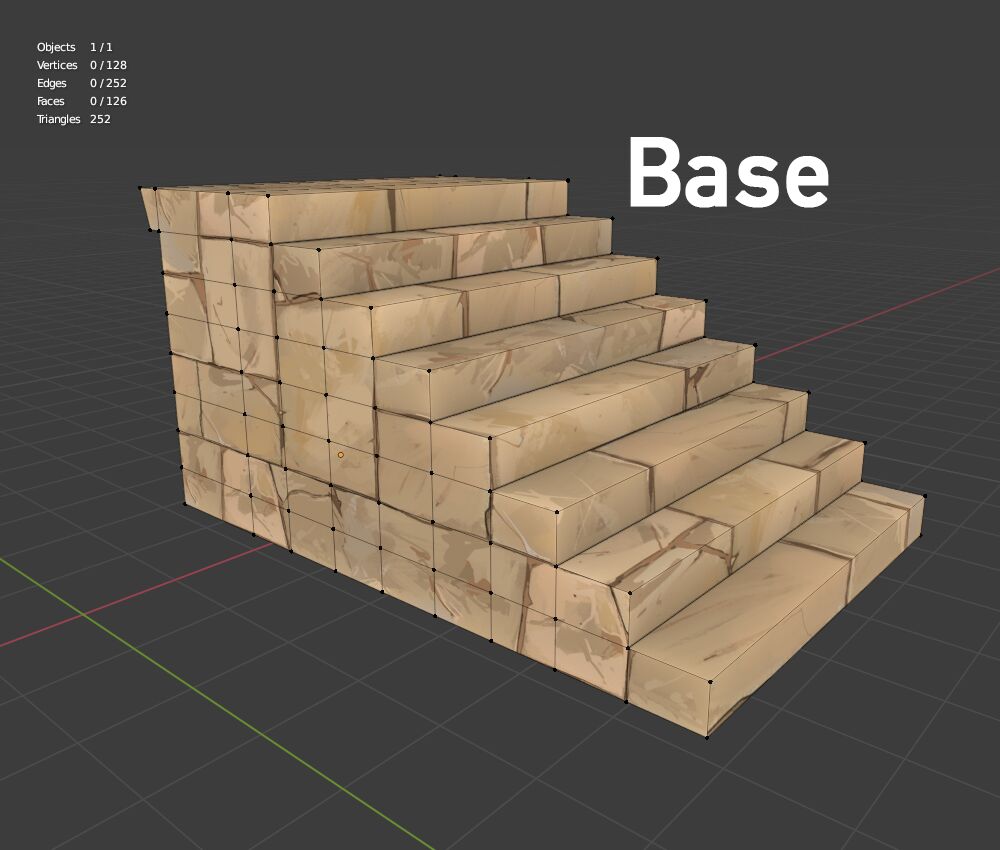
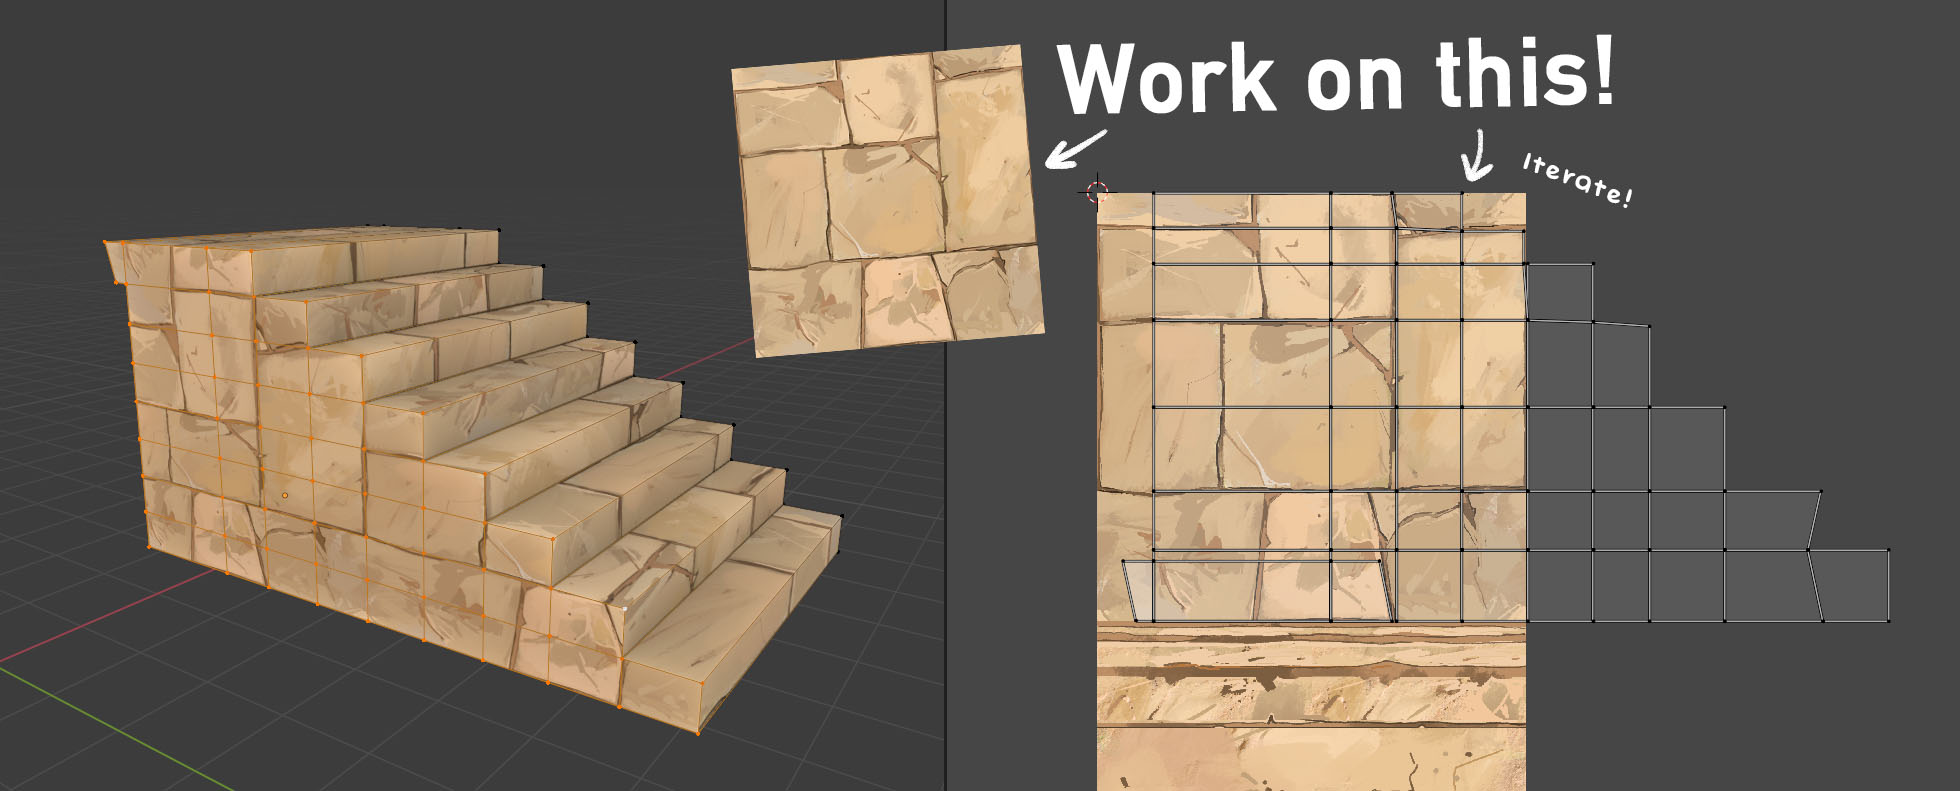
The most time-saving trick of 3d modeling is to reuse props. With a small amount of props, you can iterate more on the details, and your whole scene benefits from it. Did you notice the stairs above are composed of the same module reused 3 times? If not, then I made a good tileable texture and a good modularized model. It's the same flight of 8 steps, juxtaposed. Here's the module, isolated:
Highpoly sculpt as a big no-no
The worst time-saving trick of 3d modeling is to sculpt a high poly model, then create a simplified mesh of it, bake data textures of the difference, and then use these data textures to fake the high poly details. It needs a specific set of textures per prop, and it's very cumbersome to iterate on.
I want to propose another way of "sculpting", based on textures first.
Tiling textures
In the same spirit of modules, the purpose of tileable textures is to draw it once and use it a lot. With careful texturing, modeling and UV unwrapping, you get the feeling of specially textured props, without having to create textures for each prop.
The texture role is center. So design the texture first, work on the modeling after. To begin, plan the structure of your texture: decide what type of surface and pattern you need, and at what size. Draft it quickly and condense everything to a tileable rectangle.
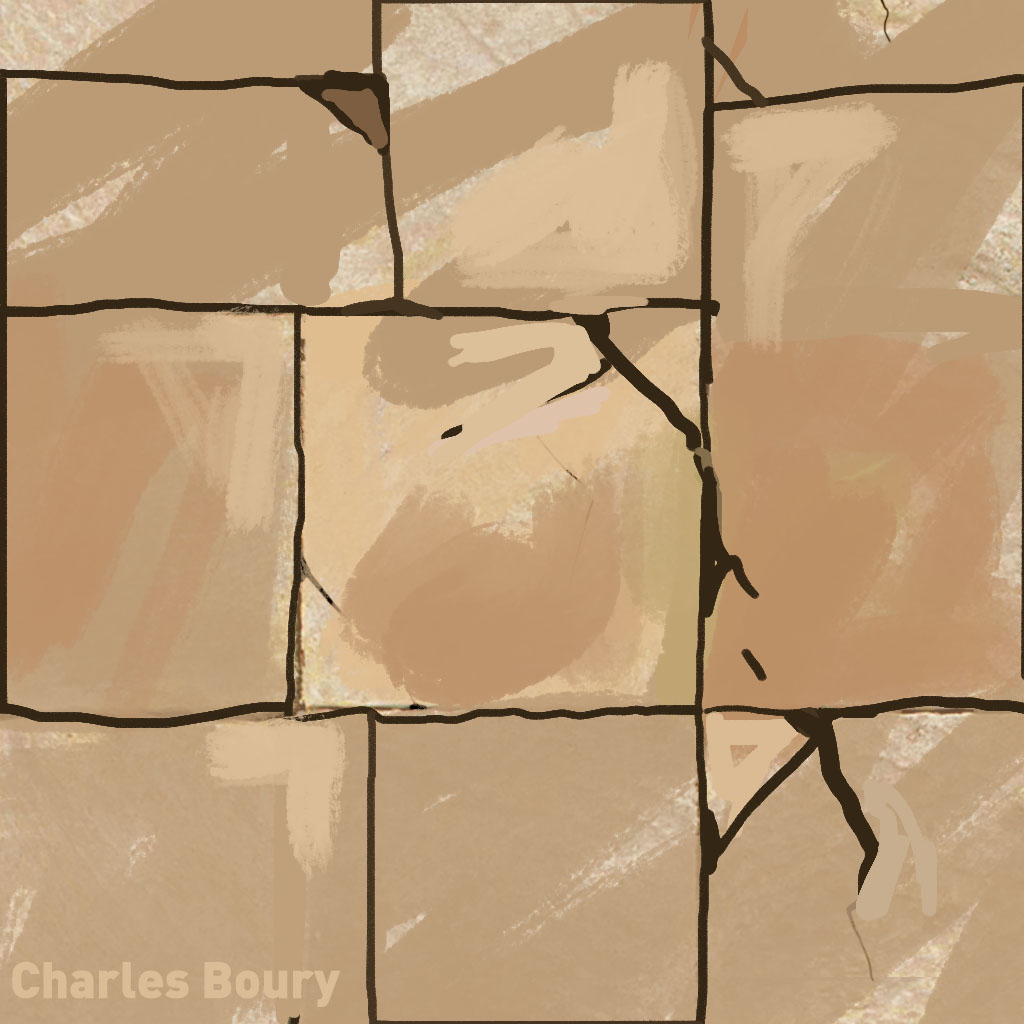
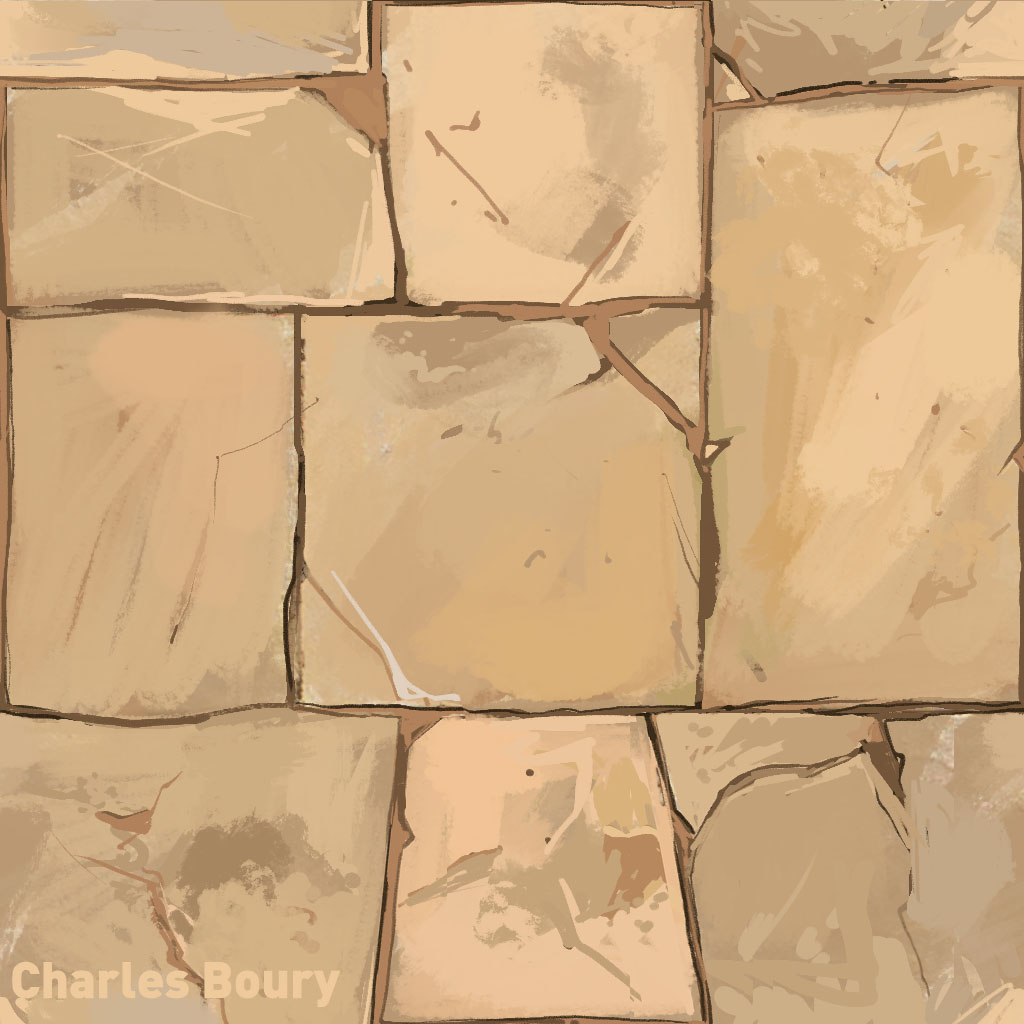
To avoid pattern recognition when tiled, aim for oddities everywhere, but no distinctive element. Essentially, make variations of interesting patterns and rub out the jarring bits sticking out when tiled. For example, look at the pavement texture below: each stone is different but also not distinctive enough. There are 5 broken corners, each unique, but alike from a broad point of view.
Keep it ugly! Keep iteration fast! Don't worry, polish will come. This workflow shines if you commit to it. Trust the process.
Unwrapping (before modeling??)
Now you can unwrap your ugly texture. Keep the modeling simple for now: just the rough shape and proportions. See if it's easy to unwrap. The goal is to try to align UVs on defining edges in the texture.
If unwrapping is hard, if you get overly stretched texture parts, your pattern is missing something. Go back and change the texture to better accomodate what you need. Iterate on the structure of your texture. For example: modify the pavement pattern, the frieze width, etc.
Some slight stretch is ok. No need for a perfect unified pixel density here.
Good work. Now it's polish time!
Modeling, finally
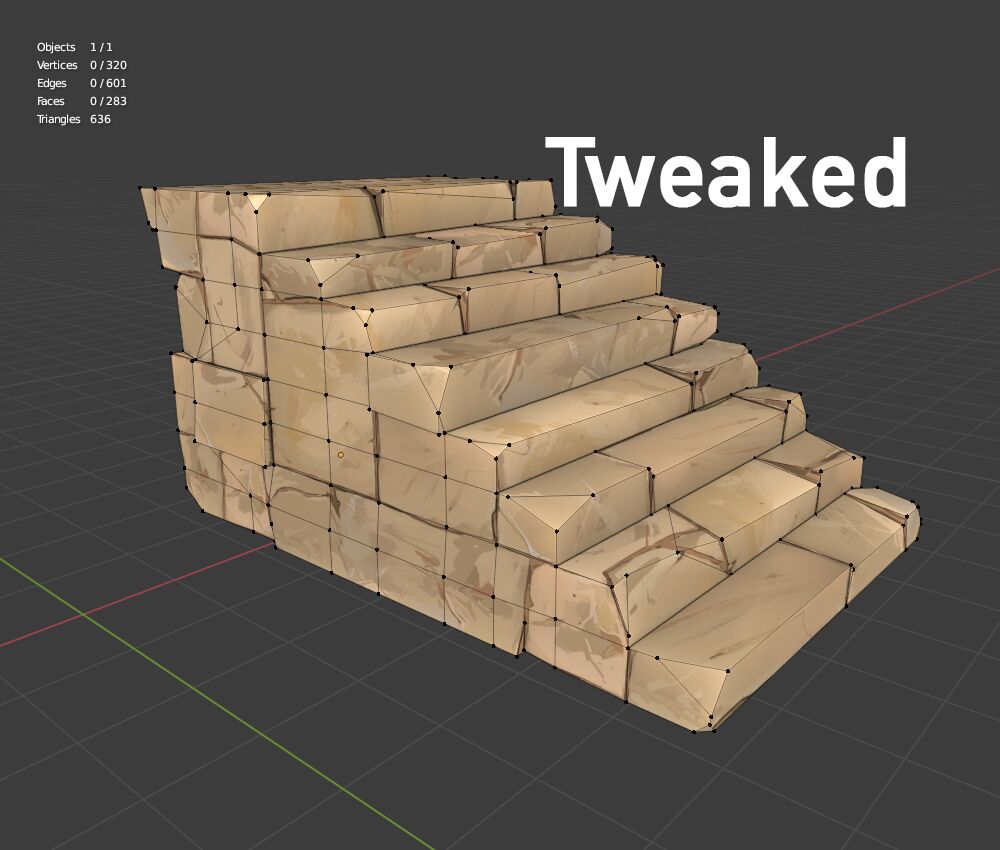
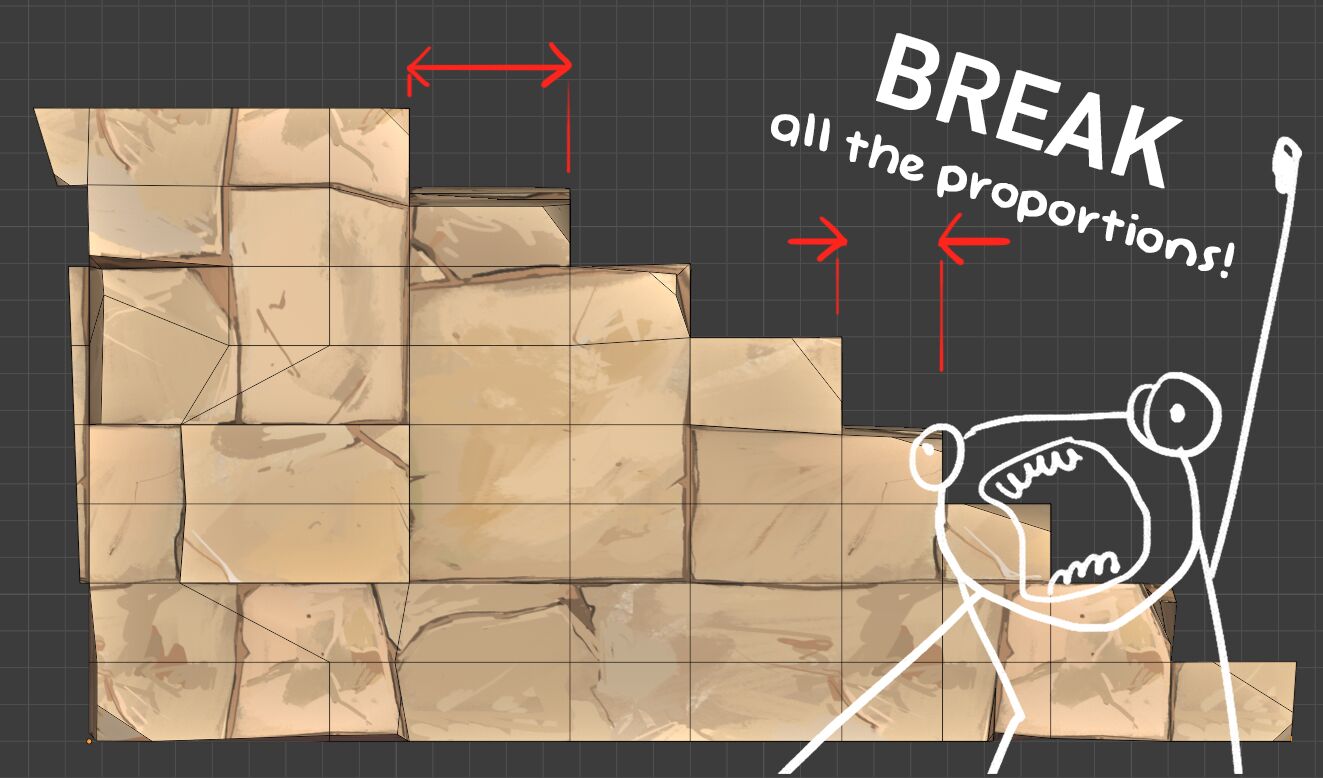
Now that you have a strong trimsheet, it's time to ruin your model :p Yes, really. Leave all your beliefs behind and destroy your beloved topology. Blender gives you nice tools for this :) We are aiming for oddities, remember?
-
BREAK all the proportions!
I know, real stairs avoid this at all cost, but we're not recreating the real world. Insert oddities here. But like before when designing the texture, don't create something too distinctive. Move things to prevent visual repetition.
-
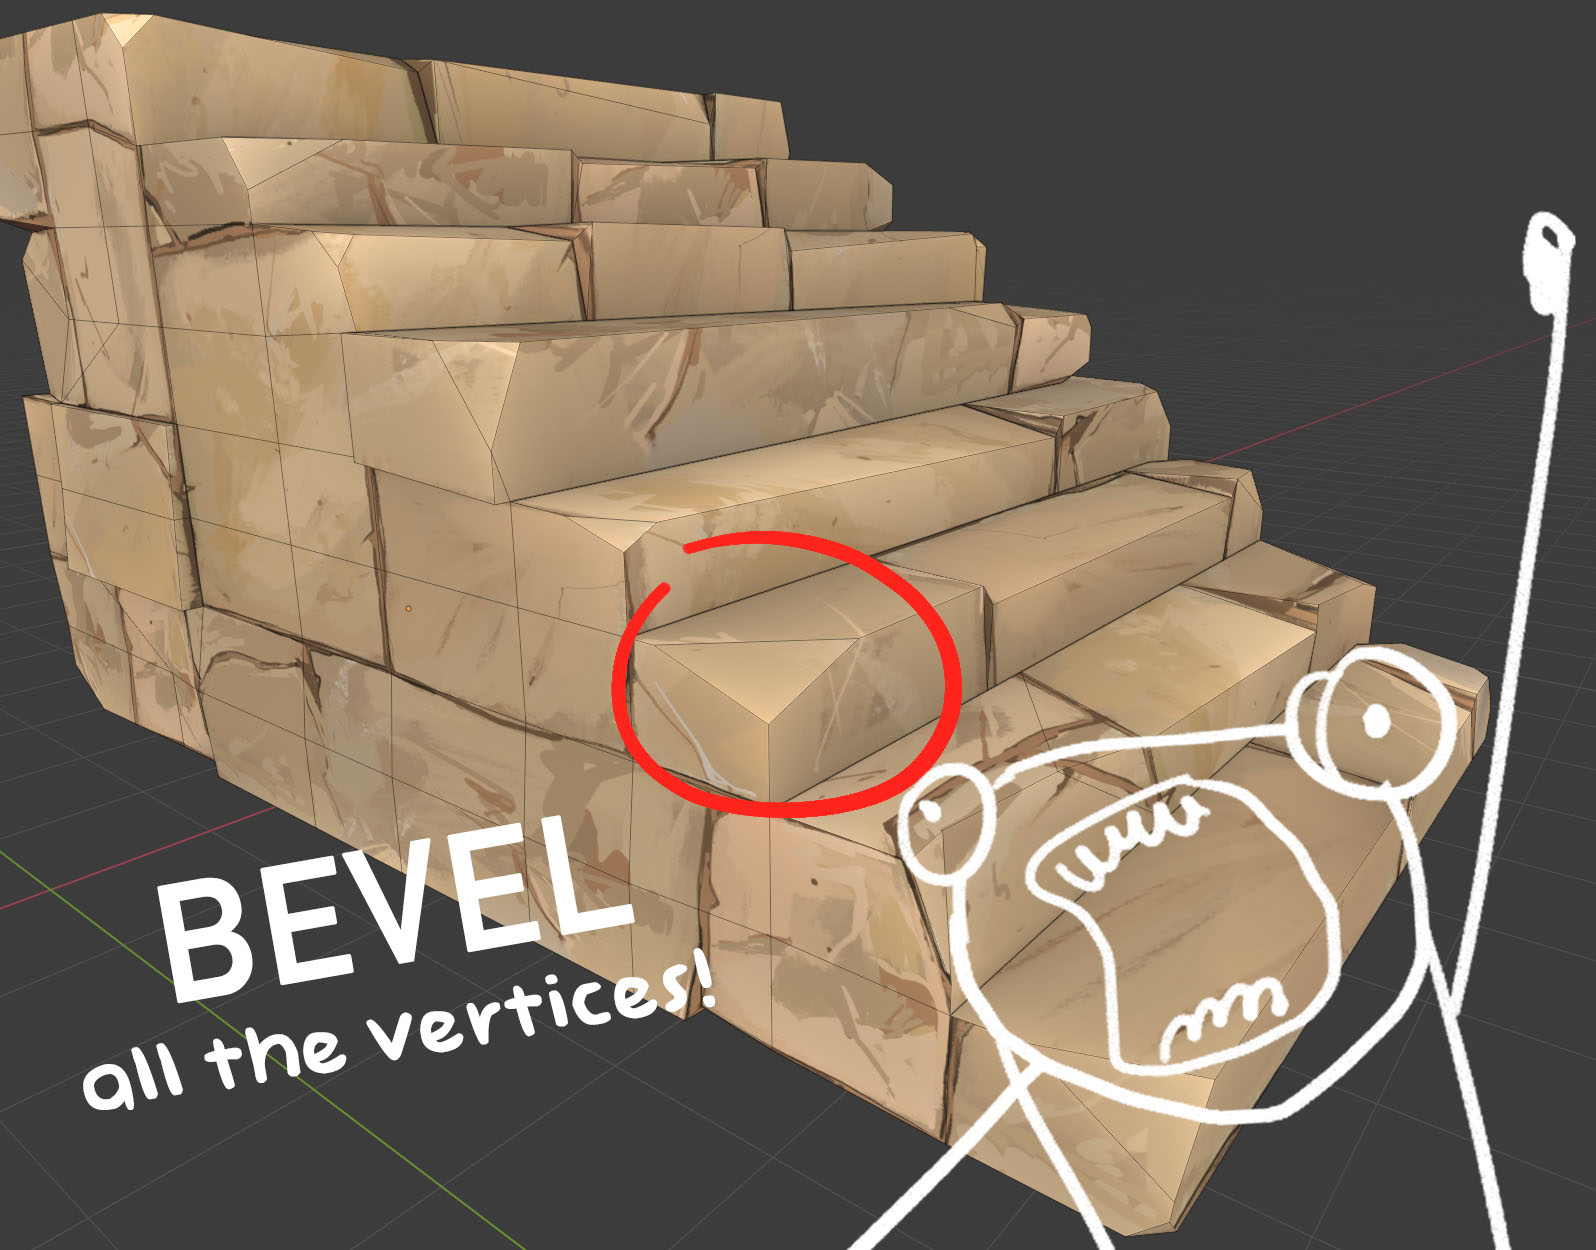
BEVEL all the vertices!
At least the ones sticking out. Don't just bevel, fiddle with the position of resulting vertices, to change the bevel slope and size.
-
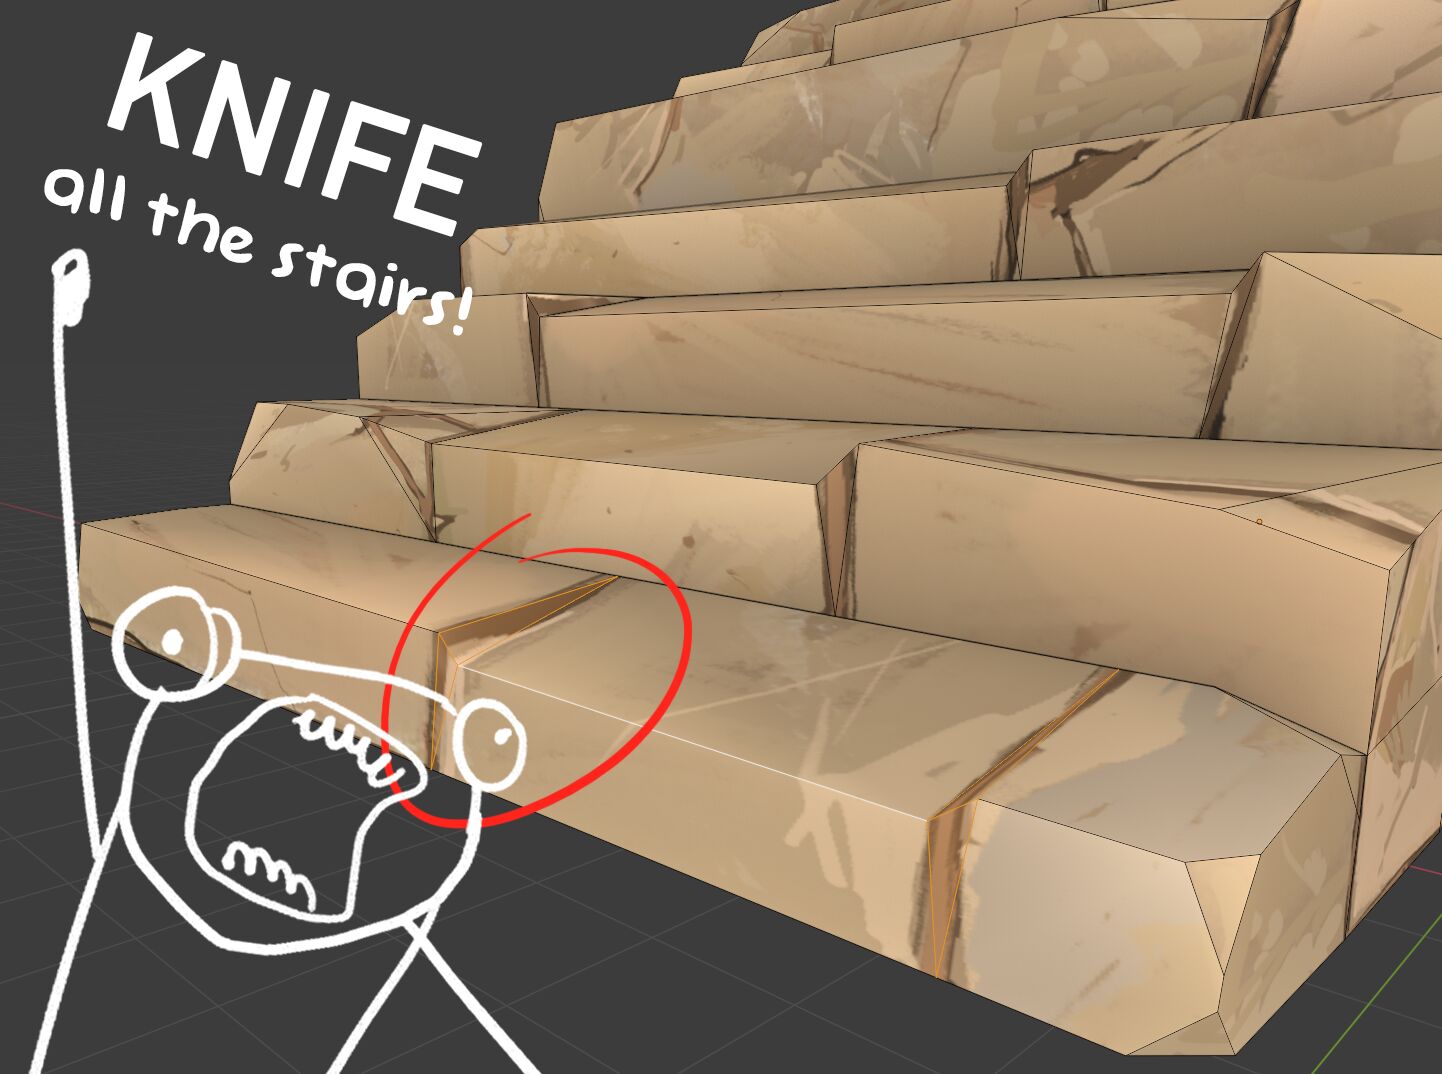
KNIFE all the stairs!
This is tricky, but results are GREAT. Basically, you create grooves on your geometry where there's something like it on the texture. Your topology is becoming very ugly, but who cares? There's no turning back anyway.
-
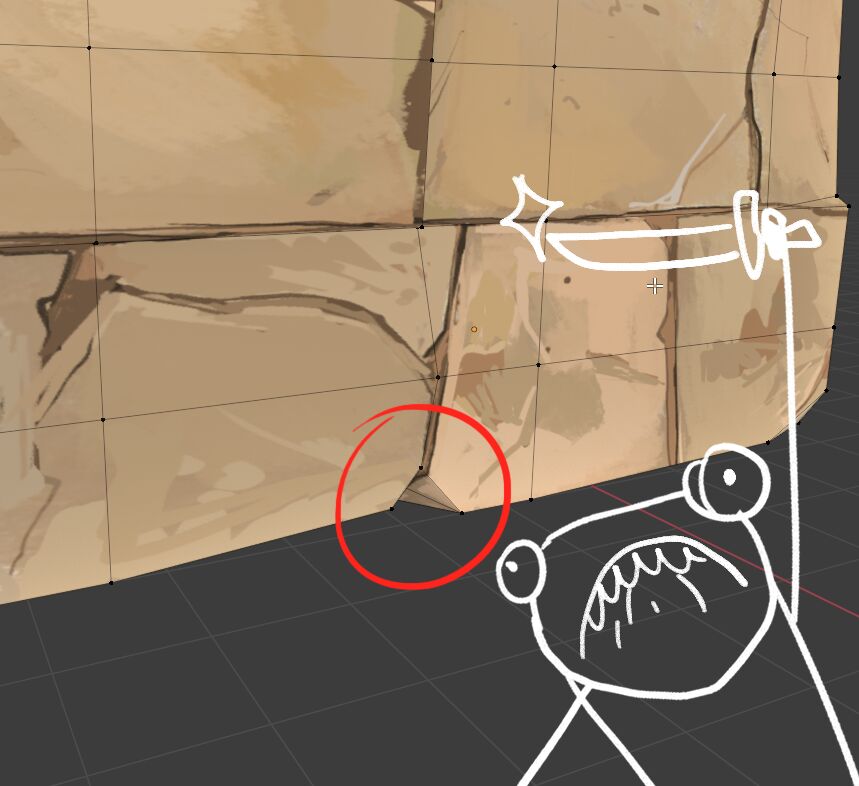
NOTCH things out!
Concentrate on the resulting silhouette of your model. Modifications inside your model won't be as visible, if not completly imperceptible. Your texture does the job, it cries way louder than tiny modifications of your mesh.
-
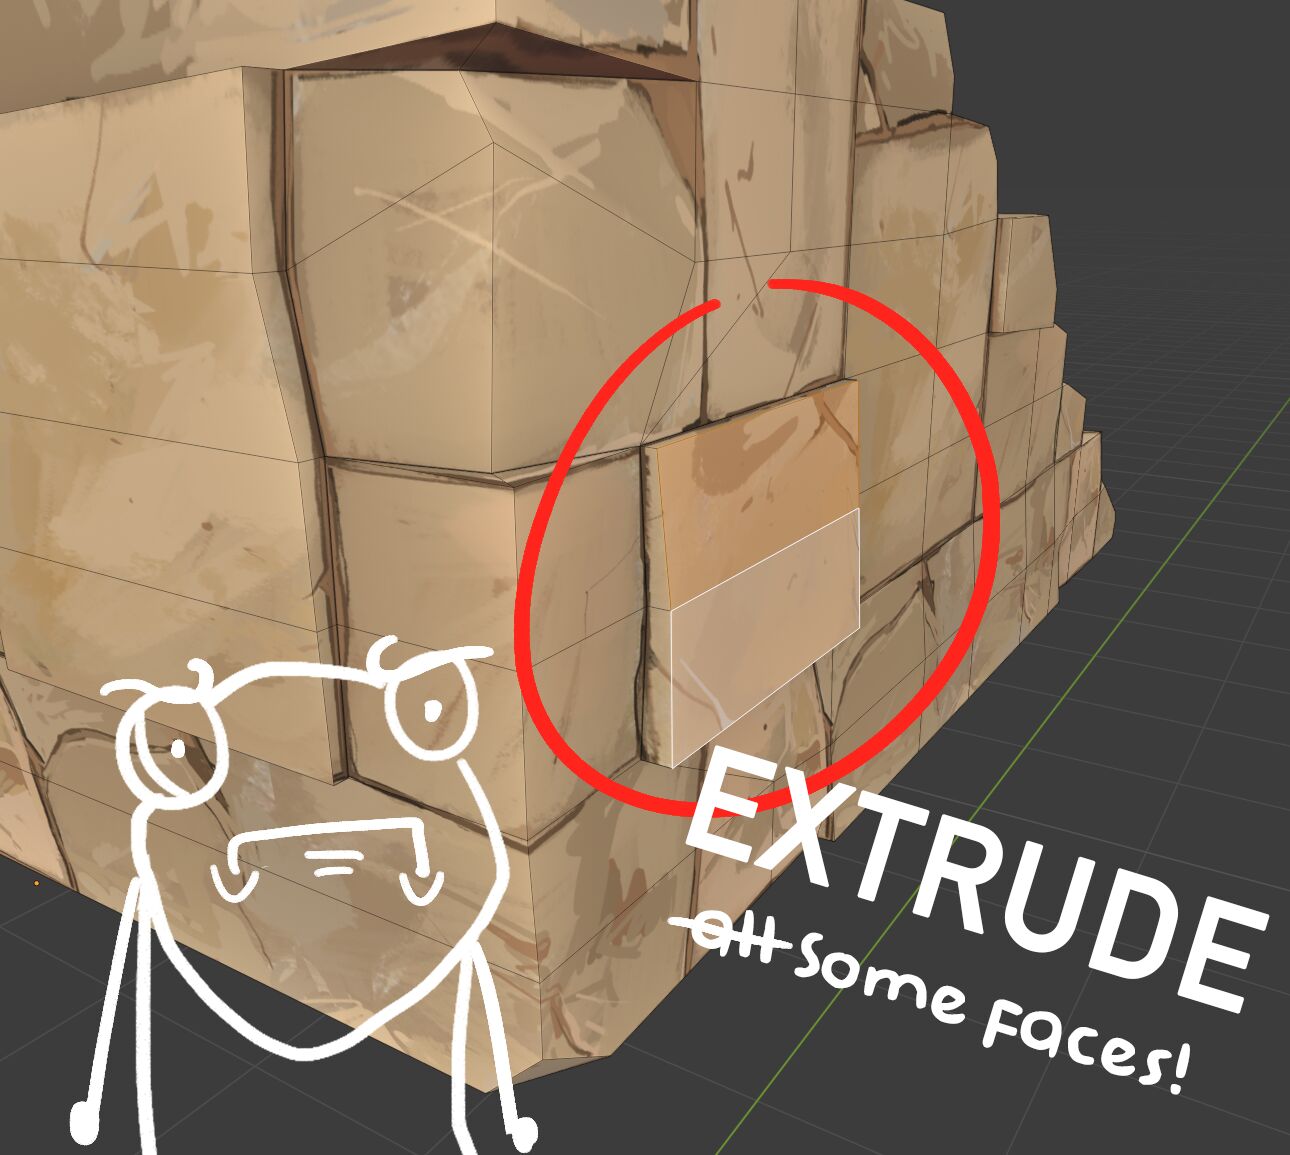
EXTRUDE all the faces!...
...well no, not all the faces. I think 1 or 2 on each side. You can also rotate the extruded faces.
Conclusion
With the setup presented here, it's now possible to make lots of props with the same texture. And because it's always the same pattern, you get a coherent vocabulary of shape and proportions.
The real goal is not to destroy topology, but to support and emphasize the texture features. it looks like you textured an intricate model, whereas it's the opposite: you gave volume to a texture. The modeling adds volume, silhouette, and shading.
3d art is time consuming. A workflow based on tileable textures is one of the ways to be more efficient. But it's not the only way. Of course, workflow and style goes hand in hand, and so the style used here is particular: a midpoly, blocky handpainted look. An old stone temple is the perfect subject for this workflow. But it works with other scenes. So try this workflow, and show what you make with it!
Thanks for reading, and happy texturing !
More refs
-
Who uses such a weird workflow, you ask? How about Blizzard artists, in Overwatch, to create richer wall edges? See this technical study of the Overwatch Beta by Timothy Bermanseder.

-
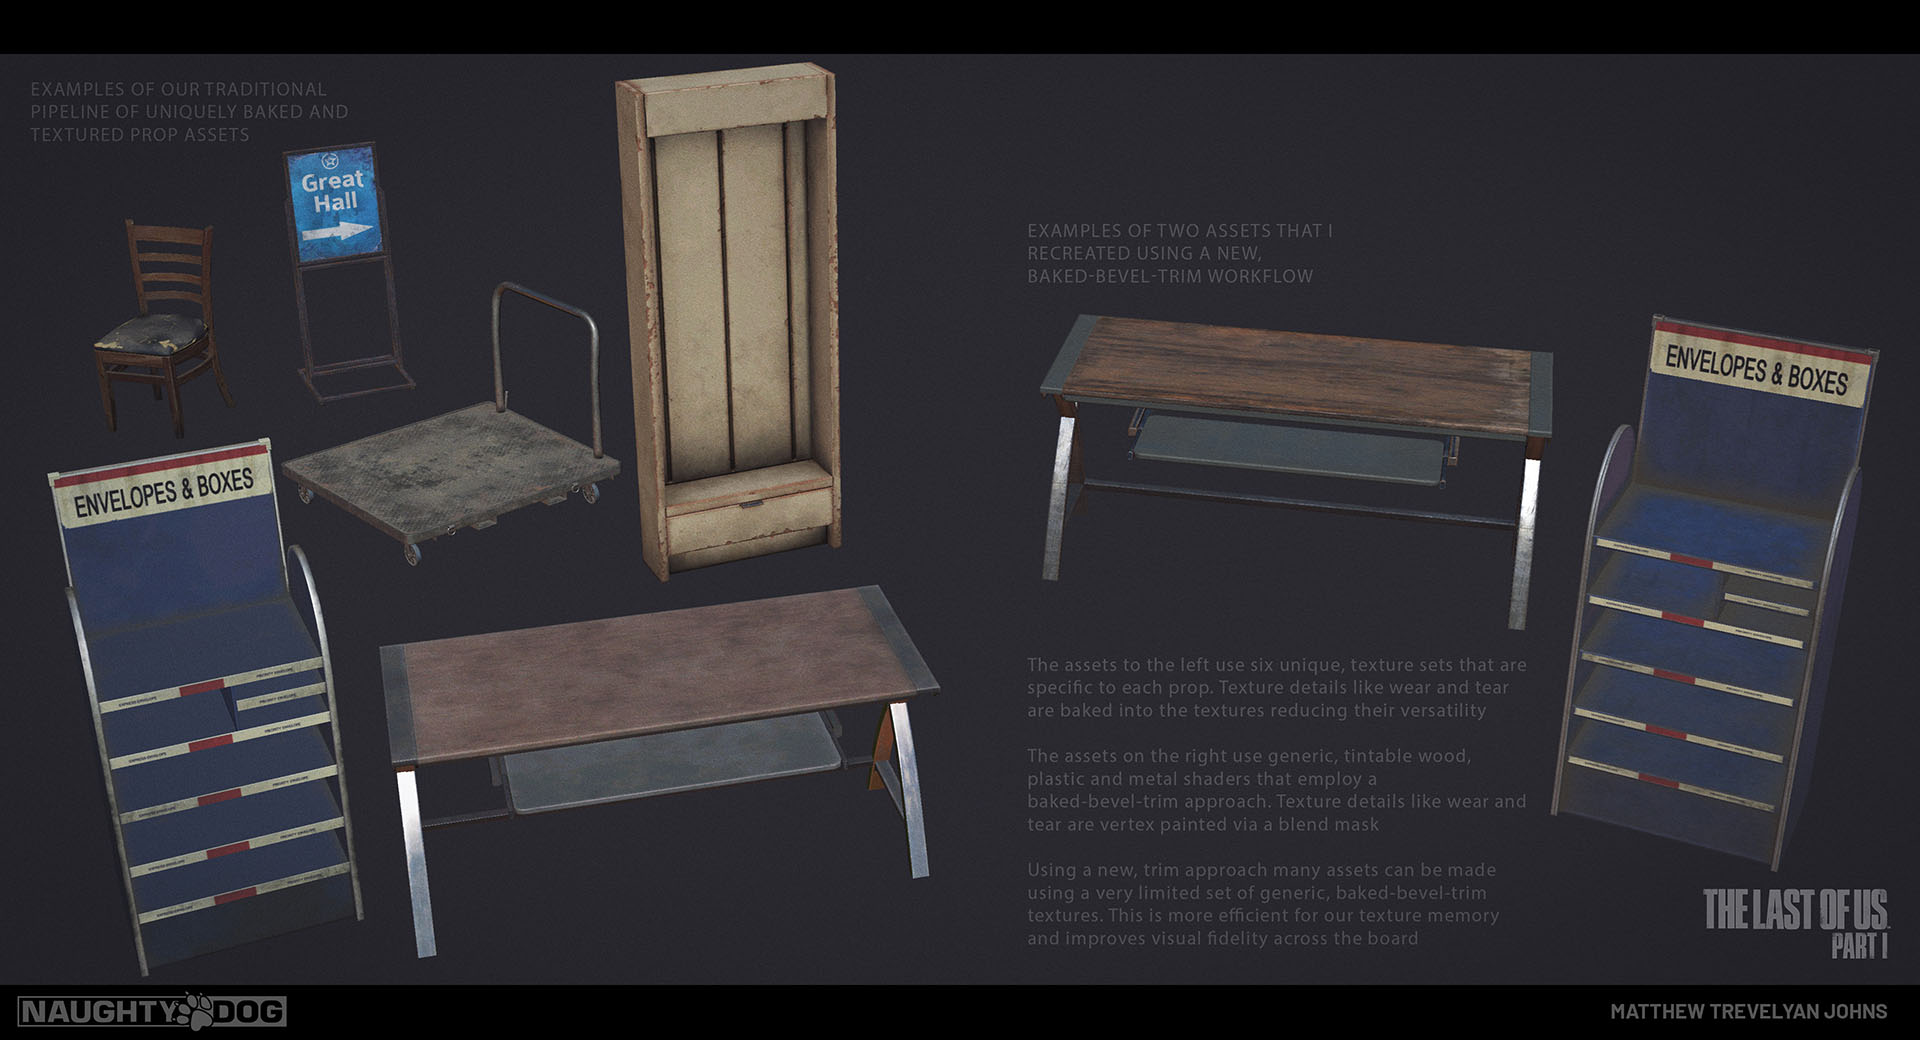
The next logical step is to use trimsheets. See the trimsheet pipeline of The Last Of Us Part 1 presented by Matthew Trevelyan Johns. It's an excellent example of how to turn a traditional pipeline into a trimsheet based one, and how they used lots of shader magic to hide repetition.
-
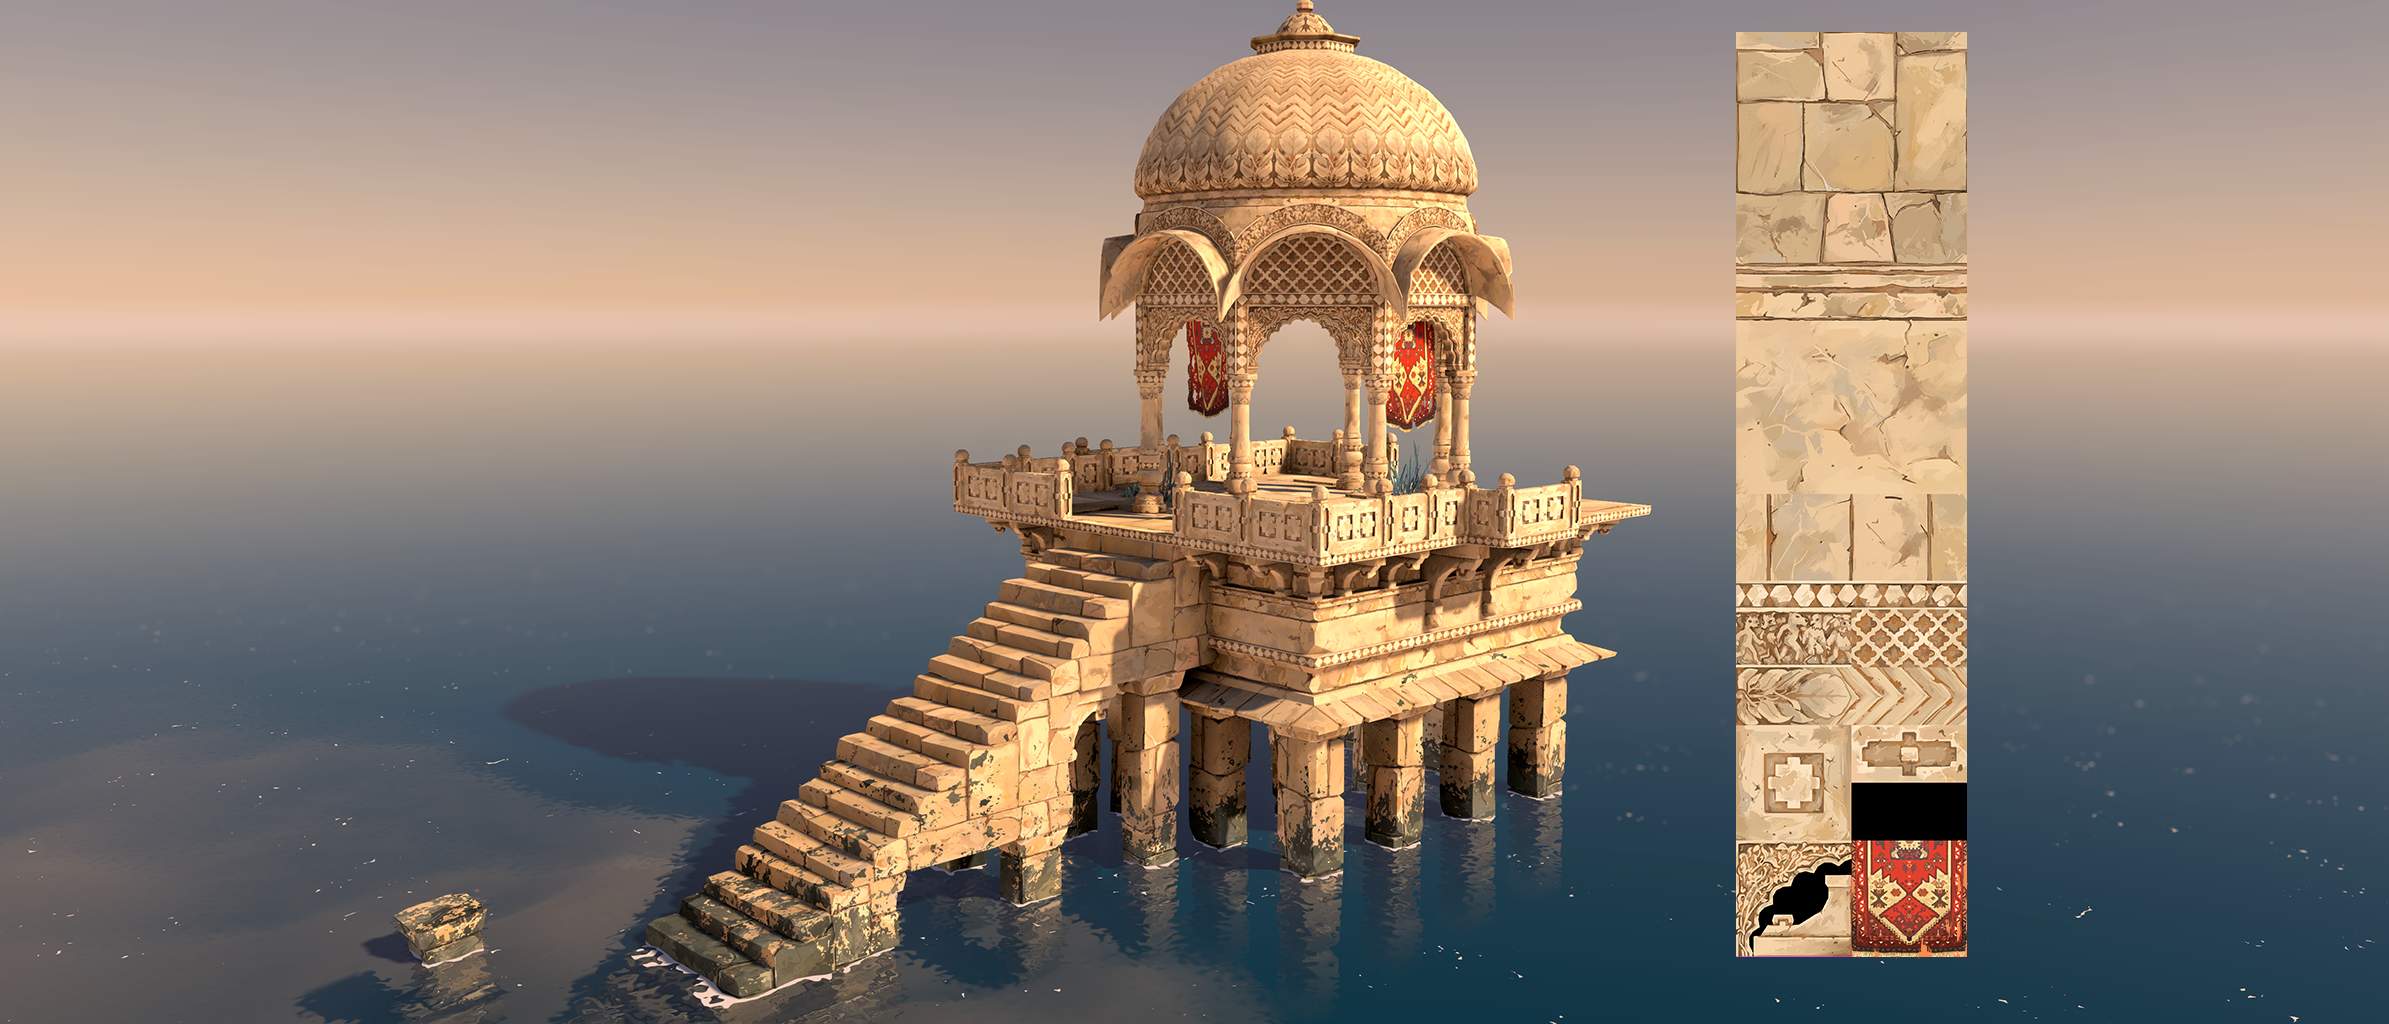
You can see more details of my Indian Temple on my portfolio, how I used trimsheets and shaders for the rest of the temple.
-
Here's a screenshot of the initial twitter thread, thanks to an unknown person who archived it with web.archive.org. Internet is wonderful.